Wood storm window guide
How to Measure for Wood Storm Windows
A custom wood storm window is built full and square to the numbers you send, so four measurements do all the work: width, height, the center-bar location and the sill angle. This guide shows where each one comes from on a typical double-hung window, with photos of the parts you will be measuring against.
Know the parts of the opening
An exterior wood storm window sits outside your double-hung window, inside the exterior casing, and closes against the blind stop. Before you pick up the tape, find these parts on your own window.
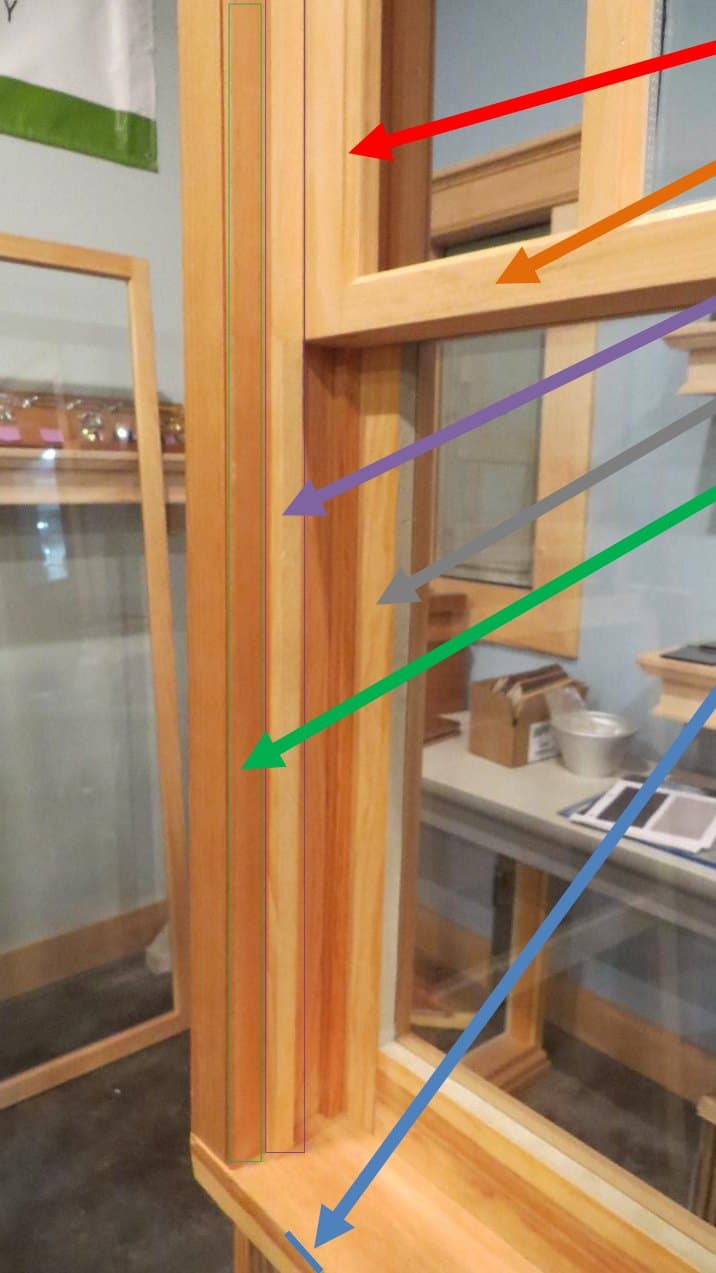
- Red
- Upper window sash
- Orange
- Meeting rail, where the upper and lower sash meet. Measure to the middle of this rail.
- Purple
- Blind stop, the narrow strip the storm window closes against
- Gray
- Lower window sash
- Green
- Exterior side casing
- Blue
- Toe of the sill, the point you measure down to for the height
The four measurements we need
Record every measurement to the nearest 1/16 inch and always list width first, then height.
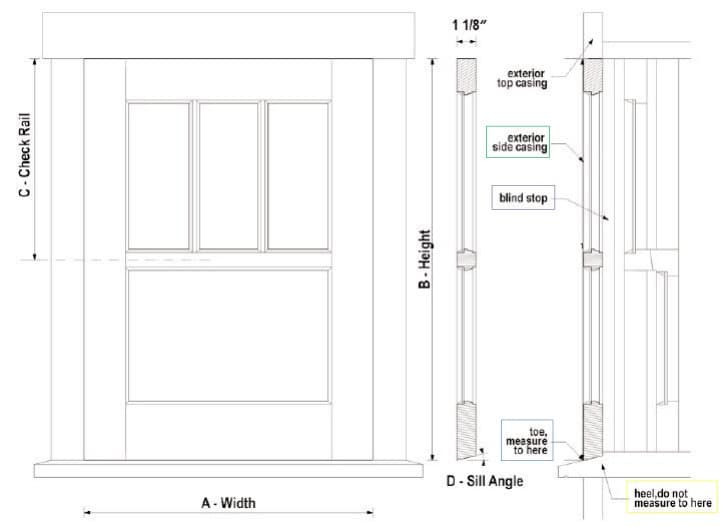
- Width (A): measure across the opening between the exterior side casings, at the plane where the storm will sit against the blind stop. Take it at the top, middle and bottom.
- Height (B): measure from the underside of the top casing down to the toe of the sill, on the left and right sides.
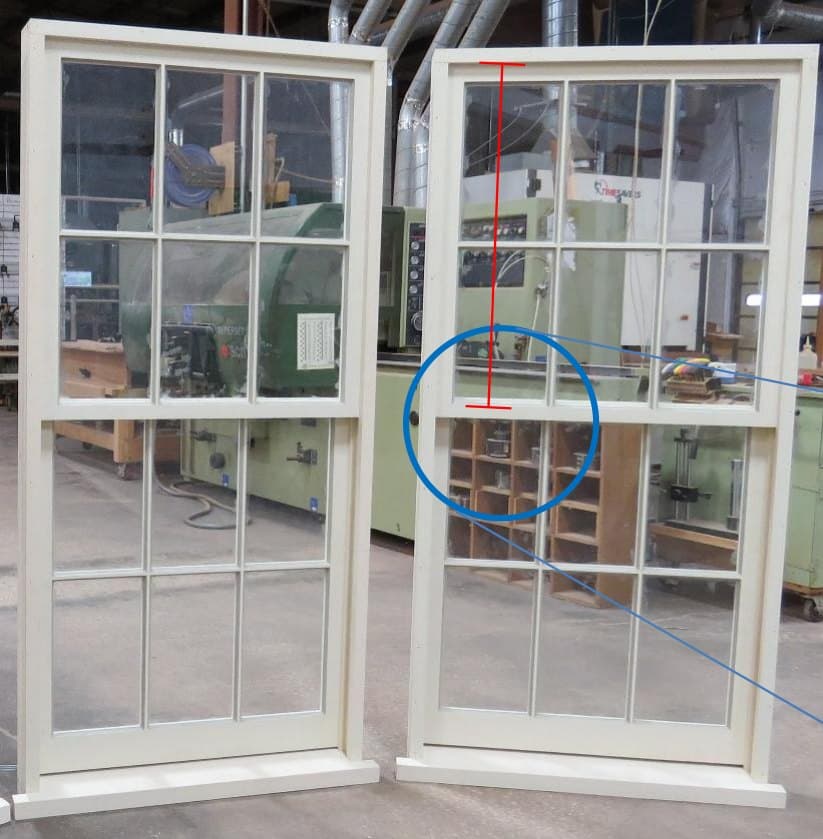
- Center bar (C): measure from the top of the exterior casing down to the middle of the meeting rail on your double-hung window.
- Square check: measure both diagonals from corner to corner. If they differ by more than 1/4 inch, the opening is out of square; send every reading so we can review it.
- Sill angle (D): note whether the sill is flat or sloped. Most older sills slope to shed water; if you can, measure the angle with an angle finder or send a side photo.
Locating the center bar
The center bar on the storm should line up with the meeting rail of your window so the two read as one from the street. Find the middle of the meeting rail from top to bottom, then measure from the top of the exterior casing down to that midpoint. We center the storm window bar on that number.
What the jamb looks like up close
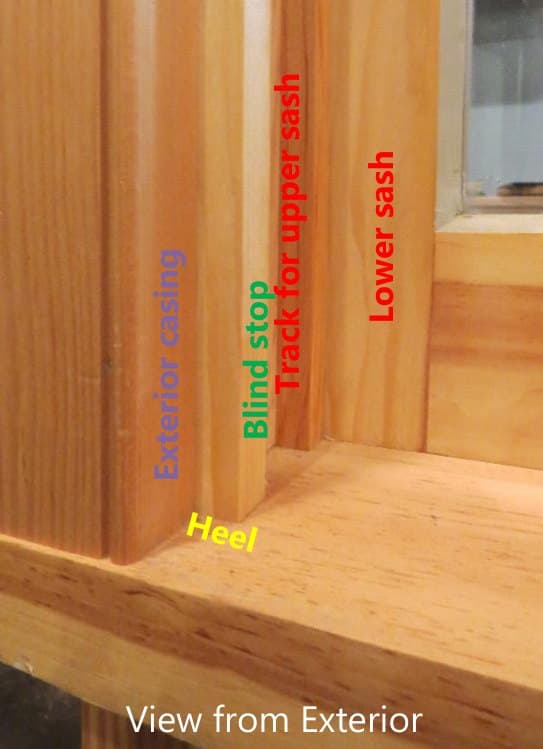
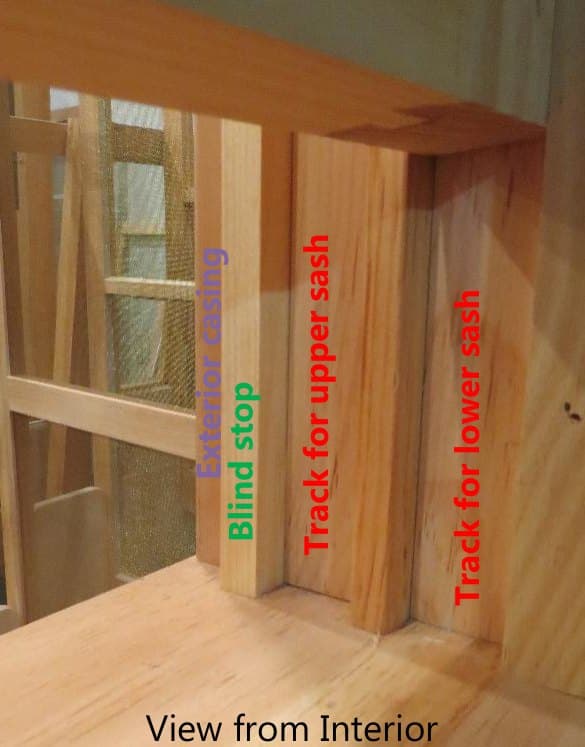
These views show the blind stop and the tracks for the upper and lower sash from both sides of the window. The storm window closes against the blind stop, so that is the plane to measure at.
Allow for real-world openings
Older openings are rarely perfectly square, paint adds measurable thickness, and wood products carry small variances. A tolerance of up to 1/16 inch is normal for wood.
Send the measurements you take and tell us about anything unusual. If readings differ by more than 1/4 inch, send every reading and a photo so we can review the opening before pricing. A little field fitting, such as light planing, may still be needed for the best fit, which is why we recommend test-fitting before you prime or paint.
- Measure every window, even ones that look identical.
- Label each opening by room and elevation.
- Send a straight-on photo of each opening and one side photo of the sill.
Frequently asked questions
Do I deduct anything from my measurements?
No. Send the opening measurements exactly as you take them. We review the clearance needed for installation before the window is built.
What if my window has no center bar?
Choose the no-center-bar option in your notes. Large single-pane openings may need tempered glass and are priced by quote.
How do I measure a sloped sill?
Use an angle finder on the sill surface, or send a photo taken from the side with a level on the sill. We confirm the angle before production.
Can you build for an opening wider than 38 inches?
Yes. Instant online pricing covers the most common sizes; larger openings are priced by quote.
Wood storm windows covered by this guide
Ready to price your windows?
Enter your width and height on the Traditional Wood Storm Window for an instant price, or send measurements for any style.